AutoPool
Tutorials
|

|
|
Basic Pool Setup
Place the AP_Manager script on an object in your scene. This will become the root of your object pools. Click the "Create Pool" button that appears on the manager script. A new child object should appear with an AP_Pool script. This is a single object pool, and any objects it creates will appear as its children. In this manner, objects available in the pool will be nicely organized in the object hierarchy. In its prefab field, drag a prefab you would like to use as the type of object this pool contains. Now, from a script that you'd like to create items, such as a gun or mob spawner, include a GameObject field to hold a reference to the same prefab: public GameObject prefab; Then, when you want to spawn an object, use: MF_AutoPool.Spawn( prefab ); To keep AutoPool fast, pool objects must have the AP_Reference script on its root. This keeps track of what pool the object came from without having to search for names, which is slow. This script will automatically get added if the object doesn't have one, but it's slightly more efficient to add it by hand. To despawn an object the easy way, use: MF_AutoPool.Despawn( gameObject ); However, it's slightly faster to reference the AP_Reference script directly using: MF_AutoPool.Despawn( refScript ); Where refScript is a cached reference to the AP_Reference script attached to the object you want to despawn. That's the basics of creating an object pool. Using object variations in a single pool
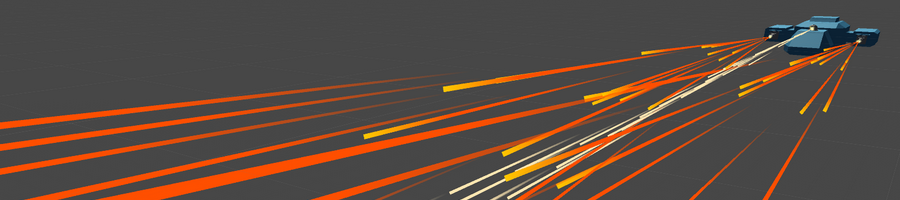
One feature of AutoPool is to be able to activate a specific child upon spawning from the pool, and the Cube prefab in the Demo Scene contains one simple version of this. This can be used to accommodate different versions of similar objects, such as different colored bullets, or a multiple versions of an enemy. In this manner, you can have many things accessing the same pool to produce objects that look and behave differently. But, unless you're dealing with very many of objects, you likely won't need to use this sort of optimization. That said, you can use an optional parameter in the spawn call to activate a specific child of the prefab, and this should correspond to a particular version of the object. Use the following methods: MF_AutoPool.Spawn( prefab, child ); MF_AutoPool.Spawn( prefab, child, pos, rot ); prefab is the GameObject the pool contains, and child is the childIndex you want to enable. pos and rot are the position and rotation of the prefab upon spawning. Prefab set-up You'll need to organize a prefab to contain multiple versions of an object. Once an object is spawned, it will be up to that object to manage itself. These objects should appear as disabled children of the root object. So if you used 1 in the child field, you'd get this: Bullets Version0 Version1 Version2 You can have a script on Bullets manage the children in OnEnable() and/or OnDisable(). AutoPool won't otherwise touch the active state of the children when returning to the pool, only when spawning. When the Bullet gets spawned, enables happen in this order:
So when the root script OnEnable() is triggered, you can do any management of children before they get enabled. When the root object gets despawned, you can manage the child objects with OnDisable() if need be. |
Automatic Pool Creation
In most cases it's usually a good idea to create all pools before runtime. From the inspector, you can easily edit their behavior and pool amounts. However, if you have a number of spawned items that themselves also create spawns, and so on, it can be difficult to predict what pools and what size of pools you'll need. In this case, you can have your spawner scripts create and modify pools on the fly. First, your object containing the AP_Manager script must allow its pools to be created and modified. Make sure Allow Create, and Allow Modify are checked. Next, you'll want to use MF_AutoPool.InitializeSpawn() in a spawner script's Awake() method. This will cause a pool to be created if one doesn't exist, and/or modify an existing pool. MF_AutoPool.InitializeSpawn( Enemy, 10, 50 ); There are two fields that control the numbers of items in a given pool, addPool and minPool. minPool is the minimum number of objects that a pool will have. And if a pool already has minPool items, addPool objects will be added to the pool instead. If a float of less than 1 is requested, addPool will add that percentage of items currently in the pool. However, if the pool size is not 0, and minPool has not been reached, the pool size will be increased to minPool + addPool. This helps cases where different scripts request varying amounts of minPool items. Typically, the fist call will create minPool objects, and subsequent calls will add addPool items. emptyBehaviour and maxEmptyBehaviour can optionally be set using InitializeSpawn(), and this will change that pool's corresponding behavior. MF_AutoPool.InitializeSpawn( Enemy, 10, 50, AP_enum.EmptyBehavior.Fail, AP_enmu.MaxEmptyBehavior.Fail ); If not specified, pools will default to EmptyBehaviour.Grow and MaxEmptyBehavior.Fail Example Usage If you have an enemy with a gun in your scene, you may wish to make sure that gun has access to certain minimum amount of bullets in the scene, say 50. Now say you increase the number of those enemies to 20. If they all need 50 bullets, that's 1000 bullets sitting in the pool. If all these enemies are unlikely to be firing at once, you probably don't really need all those bullets. But you probably need more than the original 50. So how many do we need? Well, naturally, it will depend on the game, but if you get a general idea of what to expect, we can have the scripts follow that expectation. What we can do here, is specify that we'll want a minimum of 50 bullets if there's at least one enemy, and then add, say, 10 bullets for each enemy thereafter. So in the case of 20 enemies, you'll have 240 bullets available, and this number will scale automatically if you decide to change the number of enemies. |
