SmoothTurret
Tutorials
|

|
|
|
|
|
Prefab Turrets
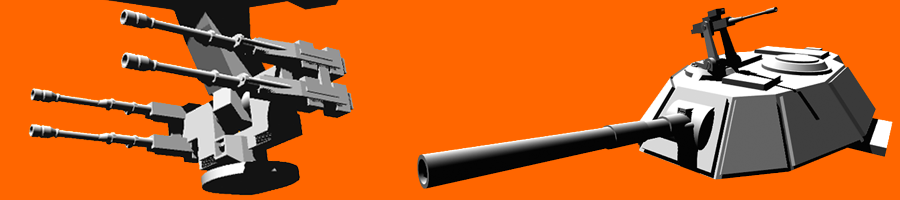
You'll find a number of prefab turrets in SmoothTurret > Prefabs > Turrets These are pre-built turrets with a number of scripts attached: ST_Turret: Controls turret aim and motion. ST_TurretControl: Controls turret behavior and weapon control. MF_B_TargetList: Holds a list of detected targets. MF_B_Targeting: Chooses a target on the list to aim at. MF_B_Scanner: Detects targets and gathers information. MF_B_Classify: Holds turret faction relationships. MF_B_Stats: Holds turret stats, such as health. MF_B_Selection: Defines turret selection icons and behavior. AP_Reference: Stores object pool information if the turret is ever used in an object pool. Further down in the prefab hierarchy: MF_B_Gun: Projectile weapon parameters. In many cases, these may include more scripts than are strictly necessary for your project. For example, if you don't need to select turrets, or have your own solution, you won't need MF_B_Selection. If have your own method of supplying targets to the turret, you won't need MF_B_Scanner, MF_B_Targeting, or MF_B_TargetList. By default, MF_B_Gun is set to use AutoPool object pooling. This will also require the addition of at object pool manager to the scene. This is simply the addition of the AP_Manager script to a scene object that won't get destroyed. AP_Manager is located at AutoPool > Scripts If you aren't using AutoPool, uncheck Object Pool towards the bottom of the MF_B_Gun script in the inspector. Automatic and manual target selection
First, you’ll need to decide if you want the turrets or units to choose their own targets, or if you’ll supply the targets from another source - such as a vehicle that might hold more than one turret, or perhaps from player input. Included are scripts to scan and choose targets, but of course you may want to extend these or build your own. Automatic target selection: The most typical way sides or factions are tracked, are through tags or layers. SmoothTurret can handle either one. MF_B_Scanner is the script that scans for targets and stores them in the MF_B_TargetList script, and MF_B_Targeting will then choose a target from that list. We will need to indicate a few things in these scripts that relate to your project. When using MF_B_Scanner, choose either Tags or Layers from the Scan Method menu, corresponding to your method of team differentiation. Next, in the Match By field, you can either supply specific tag or layer names of the factions to be designated as valid targets. Or, you can choose to target based on the faction relationship to the turret as defined in MF_B_Classify. If selecting Factions, you'll see a Targetable Faction section where you can add and define factions to target. If selecting Relation, you'll see a list of the type of relationship to target (Friend, Enemy, etc.) When using Relation, you'll need to define which factions belong to relationship categories in the MF_B_Classify script of this turret. The MF_enum script includes the faction names, “None, Side0, Side1, Side2, Side3”. You can change your tag or layers to match these names via the Unity3D menu: Edit > Project Settings > Tags and Layers. Or, you can change enums to match the tag and layer names of your project by editing this line near the top of the MF_enmus script located at: _MobFarm Basics > Scripts > Abstracts_Statics: public enum FactionType { None, Side0, Side1, Side2, Side3 }; Set the Detector Range to a range that will reach at least one of your target objects. Set Detector Interval to 1 second. By default, MF_B_Targeting will choose the closest detected target. You may change this by using the drop-down menu of Priority. Additionally, you may check Keep Current Target, and that target will remain locked until it dies or otherwise drops off the targeting list, such as due to moving out of scanner range. Finally, make sure the Controller field in ST_TurretControl is set to AI_AutoTarget. Manual target selection: If you want to manually designate a target: 1. In ST_TurretControl, set the drop-down menu of Controller to AI_AutoTarget. 2. Drag an object into the Target field of the ST_TurretControl script component in the inspector. Alternately, you may assign this target from another script. 3. Finally, make sure there is no MF_B_Targeting script active, or it may overwrite any target you have supplied. The turret or unit will now aim or fire at the provided target and will not choose targets on its own. This enough to get basic targeting working. The rest of the documentation will cover more advanced features, and describe all the functions and variables in depth. Setting up a player controlled turret
To make one or more turrets player controlled, you need an object in the scene to represent the player. This object doesn't have to be visible, or be controllable, it just needs to exist to hold the ST_Player script.
You may assign multiple turrets to a player, but you may not assign more than one player to a single turret. Additionally, an aim object can be assigned in the ST_Turret script that will show where the turret is actually pointing. Note, however, that if the aim object of the turret is given a fixed range, due to perspective, it won't seem to point at the impact point unless the player view is also aligned with the mount object of the turret. |
Creating your own turret
A blank turret prefab with the proper hierarchy has been provided to make things easier.
Next, we'll add mesh objects to represent the turret parts. Instead of placing mesh components directly to the parts, it is highly recommended to give these their own GameObjects placed as children of the part. This will allow you to freely move, scale, or rotate the mesh object.
See the Target Selection above for the next steps. Customizing tag and layer names
At some point you may wish to add or change the tag or layer names that MF_B_Scanner and MF_B_Targeting uses.
Component set-up strategies
There are a number of ways to combine scanners, target lists, targeting scripts, and turrets. The strategy employed will depend on the functionality you wish to simulate, and the performance you need. Here are some examples, listed as object hierarchies, where each line is a separate object. Scanner - TargetList - Targeting - Navigation Scanner - TargetList - Targeting - Turret 1 Scanner - TargetList - Targeting - Turret 2 Each turret and navigation script in this example has its own scanner, target list, and target. If you have scanners and turrets of very different capabilities, this can be useful. However, there may be a better way to get similar results more efficiently. Scanner - TargetList - Targeting - Navigation Turret 1 Turret 2 On this set-up, both turrets and navigation will all target the same target. Scanner - TargetList Targeting - Navigation Targeting - Turret 1 Targeting - Turret 2 Here all turrets and navigation use the same target list, but they can all choose different targets. However, if the scanner gets destroyed, they’ll all stop targeting. Scanner - TargetList - Targeting - Navigation Targeting Turret 1 Turret 2 Scanner - TargetList - Targeting - Turret 3 In this example, turrets 1 and 2 pick the same target, and navigation picks its own. Turret 3 is completely independent, and will continue to function even if the root scanner is non-functional. |
